Introduction
Electrical safety is one of the most critical aspects of any residential, commercial, or industrial system. At the heart of every safe electrical network lies a reliable earthing system, and one of the most essential components of this system is the Ground Rod. A ground rod provides a direct physical connection between electrical installations and the earth, ensuring that any excess current or fault energy is safely dissipated into the ground.
In this guide, we’ll walk you through the step-by-step process of ground rod installation and maintenance, while highlighting its importance, best practices, and tips to ensure long-term reliability.
Step 1: Understanding Ground Rods
Before installing, it’s important to know what a ground rod is.
-
Definition: A ground rod is a metal rod, typically made from copper-bonded steel, galvanized steel, or stainless steel, driven into the ground to establish a safe path for electrical current.
-
Standard Size: Most ground rods are 8–10 feet long and about 16 mm (5/8 inch) in diameter.
-
Purpose:
-
Protects people from electric shocks.
-
Prevents equipment damage.
-
Maintains system stability during lightning strikes and power surges.
-
Step 2: Choosing the Right Location
Before installing, it’s important to know what a ground rod is.
-
Definition: A ground rod is a metal rod, typically made from copper-bonded steel, galvanized steel, or stainless steel, driven into the ground to establish a safe path for electrical current.
-
Standard Size: Most ground rods are 8–10 feet long and about 16 mm (5/8 inch) in diameter.
-
Purpose:
-
Protects people from electric shocks.
-
Prevents equipment damage.
-
Maintains system stability during lightning strikes and power surges.
-
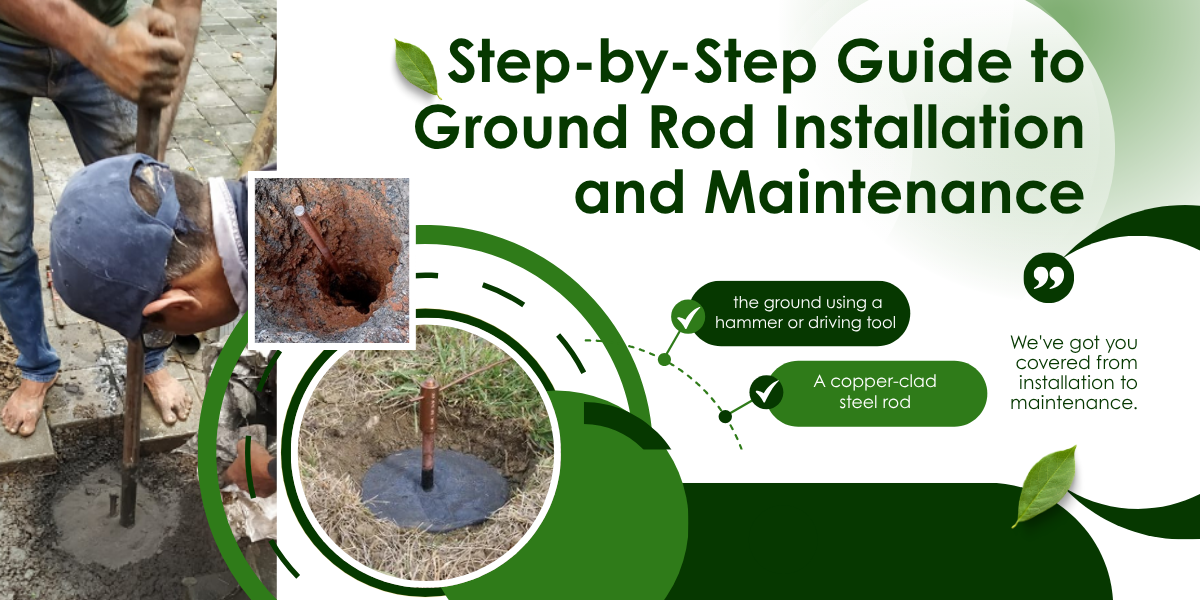
Step 3: Installing a Ground Rod
Once the location is finalized, follow these steps:
-
Gather Tools and Materials
-
Ground rod (copper-bonded/galvanized).
-
Sledgehammer or ground rod driver.
-
Copper grounding conductor (wire).
-
Ground rod clamp.
-
Protective gloves and safety gear.
-
-
Drive the Ground Rod into the Earth
-
Position the rod vertically and start driving it into the ground using a sledgehammer or rod driver.
-
Drive it until at least 8 feet of the rod is below the ground surface.
-
If vertical installation is not possible, the rod may be installed at a 45-degree angle or buried horizontally (minimum 30 inches deep).
-
-
Connect the Grounding Conductor
-
Use a listed ground clamp to connect the copper wire to the rod.
-
Ensure the connection is tight, corrosion-free, and weather-resistant.
-
Bond this wire to the main electrical service panel or system.
-
Step 4: Testing the Ground Rod
Installation alone is not enough. Testing ensures that the rod provides the required resistance.
-
Use an Earth Resistance Tester or Clamp-on Ground Tester.
-
The recommended resistance should be 5 ohms or less (as per NEC/IS standards).
-
In areas with high soil resistivity, more rods may be needed to achieve the required resistance.
Regular testing helps confirm that the grounding system continues to perform effectively over ti
Step 5: Ground Rod Maintenance
Like any other component of an electrical system, ground rods require periodic inspection and maintenance.
-
Check Connections: Inspect clamps and wires for corrosion or looseness.
-
Prevent Rusting: Use copper-bonded rods as they last longer and resist corrosion better than plain steel rods.
-
Replace When Necessary: If the rod is damaged, heavily corroded, or fails to provide the required resistance, replace it immediately.
-
Periodic Testing: Conduct grounding resistance tests every 1–2 years, especially in industrial setups.
-
Soil Enhancement: In high-resistivity soils, adding bentonite, charcoal, or conductive compounds around the rod can improve efficiency.
Common Mistakes to Avoid
-
Installing rods too close to building foundations.
-
Using undersized or poor-quality grounding conductors.
-
Skipping resistance testing after installation.
-
Ignoring corrosion and loose connections.
-
Assuming one rod is always enough – sometimes multiple rods are necessary.